Places We Definitely Forget to Clean!

1. Underneath furniture: People often forget to clean underneath their furniture, such as sofas, beds, and dressers. Dust and dirt can accumulate in these areas and create a buildup over time. So how do you keep on top of this? There are a few things you can do:
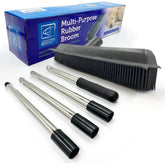
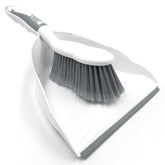
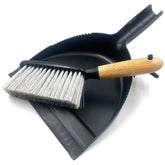
Use a long-handled duster or broom. This allows you to reach underneath the furniture without having to move it. Gently slide the duster or broom underneath, and sweep any dust or dirt out from underneath the furniture.
Use an extension duster: There are extendable and bendable dusters available on our website with fantastic cleaning fibres that attract dust and hair. These dusters can easily navigate underneath furniture and pick up debris from hard-to-reach areas. Remember to be gentle when cleaning underneath furniture to avoid damaging it.
2. Light fixtures: Light fixtures can accumulate a lot of dust and dirt overtime, especially if they are not frequently used. Make sure to include them in your cleaning routine. Here’s how to safely clean them without risk of hurting yourself. (Yes, that can happen trust us!)
Turn off the power: Before cleaning any light fixture, make sure to turn off the power at the fusebox or switch off the light from the main control. This ensures your safety while cleaning. Next, remove the light bulbs: Carefully remove any light bulbs from the fixture and set them aside. If the bulbs are dirty, you can clean them separately using a glass cleaner.
Begin to dust, start by dusting the fixture using a soft microfibre cloth or an extendable duster if the fixture is too high, something like our telescopic microfibre duster would be ideal. Gently wipe the surface and remove any loose dust and debris. For hard-to-reach places, you can use the long-handled duster and bend it to the required shape to get into the nooks and crannies.
If your light fixtures have glass or plastic covers, carefully remove them and wash them with warm, soapy water. Rinse them thoroughly and dry them before reattaching them to the fixture, please please please make sure they’re dry though! Water and electricity do not mix. Also be cautious when removing and handling delicate covers to avoid breakage.
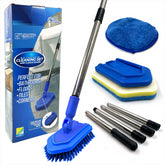
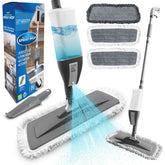
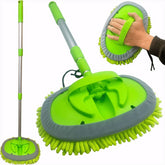
Clean metal or surface areas: Use a mild cleaning solution, such as a mixture of warm water and dish soap, to clean the metal or surface areas of the fixture. Dip a soft cloth or sponge in the cleaning solution and gently wipe the fixture. Avoid using abrasive cleaners or rough scrubbing pads that could damage the finish. Again if you cannot remove the fixture our telescopic bathroom cleaner with microfibre pad would be an ideal way clean the surface areas at a height.
Dry and reassemble, after cleaning, ensure that all parts of the fixture are completely dry before reassembling it. Make sure the bulbs are properly screwed in and the glass or plastic covers are securely attached. Remember, when cleaning light fixtures, always use caution, especially if you need to use a ladder or step stool.
3. Electronics: Keyboards, remote controls, and smartphones are often overlooked when it comes to cleaning. Yet, they can harbour a lot of germs and bacteria.
Before cleaning any electronic device, make sure to power it off and unplug it from the power source. This is essential for safety reasons.
Clean with a microfibre cloth, dampen a microfibre cloth with a small amount of dish soap and water (if approved for use on the device) and gently wipe the surfaces of the device. Take care not to moisten the cloth too much or let any liquid seep into openings. Avoid using harsh chemicals or excessive moisture.
Clean keyboards: Use compressed air or a small vacuum cleaner with a brush attachment to remove debris from between the keys. For more thorough cleaning, you can lightly dampen a cloth with warm water and gently wipe the keys. Allow the keyboard to dry completely before using it again.
Remote controls: Remove the batteries from the remote control and use a cloth lightly dampened with water to wipe the buttons and surfaces. Pay attention to the areas around buttons, as they can gather the most grime. Allow the remote control to dry completely before inserting the batteries and using it again.
Smartphones and touchscreens: Use a microfibre cloth slightly dampened with water or a 50/50 mixture of water and disinfectant to clean the screen and surfaces of your smartphone. Be gentle and avoid applying excessive pressure to prevent damage. Avoid using abrasive materials that can scratch the screen.
4. Blinds: Dust and dirt can accumulate on blinds easily. Be sure to clean them regularly with a microfibre cloth or duster to keep on top of it.
Start by closing the blinds completely and using a microfibre cloth to gently wipe across each slat. Work from top to bottom, and then rotate the blinds to clean the other side. This method is suitable for routine cleaning to remove dust and debris.
For deeper cleaning, you can remove the blinds from the window and soak them in a bathtub filled with warm water and mild detergent. Gently wipe the blinds in the water for a few minutes, paying attention to any particularly dirty areas. Then, rinse them with clean water and wipe each slat with a microfibre cloth before allowing them to air dry completely.
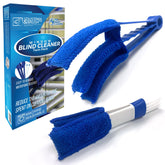
Using a blind-cleaning tool: We offer an ideal blind-cleaning tool with multiple microfibre sleeves that simultaneously clean both sides of the blinds as you slide the tool across them. These tools can be effective for quick and convenient cleaning and like a microfibre cloth great for routine cleaning to keep on top of your blind’s cleanliness.
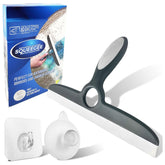
5. Shower Heads and Taps: Hard water can leave mineral deposits on shower heads and taps, reducing their efficiency and making them look unsightly. Soaking them in vinegar and water solution can remove these deposits.
Start by creating a cleaning solution using equal parts of white vinegar and water. Pour the solution into a small plastic bag or a container large enough to fit the shower head or tape (this may be a little tricky with a container which is why bags are more ideal). If possible, unscrew the shower head or tap (if it easily twists off). Submerge the shower head or tap in the vinegar solution. Make sure it is fully covered and leave it to soak for at least 30 minutes. This will help dissolve mineral buildup and grime.
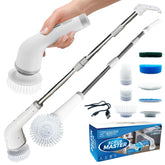
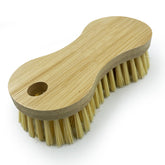
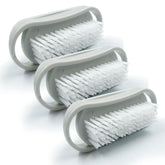
After soaking, use a grout brush to gently scrub the shower head or tap, removing any remaining buildup or residue. Pay special attention to the nozzle holes and crevices. Rinse thoroughly with water to remove any vinegar or loosened debris. Once clean, reattach the shower head or tap to the shower arm or spout. Take care not to over tighten to avoid damaging the threads.
For taps, soak a cloth in the vinegar solution and wrap it around the faucet. Secure it in place with a rubber band or clip. Leave it for 30 minutes to dissolve any mineral buildup. Afterward, remove the cloth or sponge and rinse the faucet with water. Use a soft cloth to dry and polish the surface.
If the mineral buildup is severe and the shower head or faucet cannot be easily removed, you can try using our small 3 in 1 grout brush to clean the nozzle holes and remove deposits.


